Stitching tools
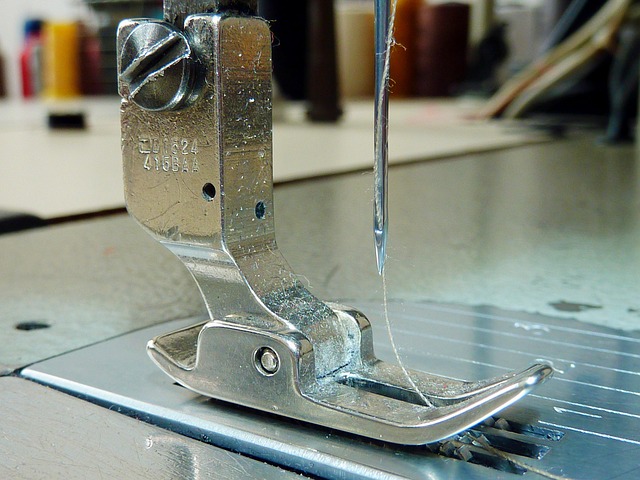
Sewing machines, hand needles, presser feet, and threads form the stitching set. Learn how stitch length, tension, and needle choice affect seams on light cotton, dense linen, and heavier curtain fabrics.
Know what controls do and when to change settings to match fabric and thread.
Set up lighting, cables, and cutting zones so you can work without strain or surprises.
Simple cleaning and checks help reduce tension issues and uneven feeding.
Home textile work uses a small set of core tools repeatedly. The most important categories are stitching, cutting, pressing, and measuring. When these tools work together, projects become predictable: seams align, hems sit flat, and fabric behaves as expected. When one category is missing or used incorrectly, the same problems repeat, such as skewed panels, uneven stitch lines, bulky corners, or shine from overheating with an iron.
Use this page to learn what each tool is for, how to choose a reasonable option for your projects, and how to handle it safely. The guidance is written for a home environment where you may share space with daily activities, so we emphasize tidy storage, cord management, and clear cutting zones.
Sewing machines, hand needles, presser feet, and threads form the stitching set. Learn how stitch length, tension, and needle choice affect seams on light cotton, dense linen, and heavier curtain fabrics.
Fabric shears, rotary cutters, cutting mats, and snips support clean edges. Accurate cutting reduces distortion and makes matching panels and patterns much easier during assembly.
Irons, pressing cloths, boards, and seam rollers shape fabric as you sew. Pressing is a construction step, not just a final touch. Learn settings, steam basics, and how to avoid shine or scorching.
Tape measures, rulers, squares, chalk, and erasable markers help you keep seam allowances and hems consistent. Reliable marking prevents drift and reduces the need to unpick seams.
A safe setup keeps your attention on the work rather than on hazards. Many issues come from small oversights: a trailing cord near an iron, a rotary cutter left open, or poor lighting that makes seams hard to read. A few simple standards reduce mistakes and help you work comfortably for longer sessions.
If you share your space, consider how you will store sharp tools and hot equipment. Keep a clear surface for cutting, and separate pressing from stitching so you do not move hot tools across fabric stacks or over cables.
Use direct task lighting to reduce eye strain. Position your chair so shoulders stay relaxed and fabric feeds straight.
Keep iron cords away from edges and foot pedals. Switch off and unplug hot equipment when leaving the area.
Close rotary cutters after every cut and store blades safely. Keep hands behind cutting paths and use a stable mat.
Keep fingers clear of needles and moving parts. Turn the handwheel toward you and stop stitching before adjustments.
A good habit is a two minute reset after each session: close blades, unplug the iron, cover the machine if needed, and clear thread scraps to keep the next setup calm and predictable.
Many stitching problems are not caused by skill but by setup. A dull needle, lint buildup, or the wrong thread path can create uneven tension and skipped stitches. Good maintenance is simple: replace needles regularly, clean the bobbin area, and keep cutting tools sharp. These steps protect fabrics and reduce the need to redo seams.
When you troubleshoot, change one thing at a time. Test on a scrap of the same fabric and use a consistent seam allowance. This makes the cause clearer and helps you build reliable intuition about how fabric, needle, and thread interact.
If you want a guided path that combines tool setup with projects, explore the course programs. Each module links technique choices to equipment settings, so you understand why a specific needle, foot, or pressing routine is recommended.